Wednesday, March 5, 2014

Pink Pretty Princess

Pink pretty princess posing in pink pajamas...


This weekend we will be meeting up with everyone to celebrate this little princess's 2nd birthday!!

So happy to spend time with all our kids, our son in law's family and this little pumpkin pie.

Here are a couple of other recent pics...


She loves to carry this plush puppies...and sat here and said "Cheese"!
(taken on Feb 4, 2014, she sat down and asked her mommy to take a picture!)


And then she posed the puppies perfectly propped up beside her for another pic...


And here this pretty pink posy is loving on one of her real puppies...
(This particular picture was a previous pic posted on Bunny, Books, and Best Buddies).

*****

On this post, I am sharing the drawing that I created for our grandbaby for her first birthday.
(If you have not already had a chance to look at my Personalized Sketches facebook art page, I would love it, when you do look around at other art drawn in a person's name, if you leave any comments beneath them...it is fun to know that you were by :o) And oh please, do "like" my page there too! 


In this one, you may notice the different flowers....of course, these all do not grow as shown, but rather represent each birth place of her mommy, daddy, Gigi & Bear (her other grandparents), Papa & Lolli (my hubby and I).   

Her mommy ~ born in New Mexico > NM's state flower  > the Yucca flower/plant
Her daddy ~ born in Kentucky > KY's state flower > the Goldenrod
Her Gigi ~ born in Kentucky > KY's state flower > the Goldenrod
Her "Bear" ~ born in Tennessee > TN's state flower > the Iris
Her Papa ~ born in Hawaii > HI's state flower > the Hibiscus
Her Lolli (me :o) ~ born in the Philippines > Philippine's national flower > the Sampaguita

****
Joining in with wonderful Jenny's Alphabe-thursday's P posts...

Oh my! I am so, so, so behind...with my blog visiting! (Working at the dental office as a temp hygienist, working on art orders, and sewing up a storm for our little sweet pea's birthday...is limiting blog time, but I will catch up! Thank you all for stopping in and I will return each of your lovely visits!

...speaking of...I cannot find some of your blogs when I click onto your names, unless it goes directly through Blog connections, but not through google + connections.


 Signature for blog

Wednesday, February 26, 2014

Orchestra

Date night to the University of Kentucky Symphony Orchestra.


My hubby and I waiting for the performance to begin.

(I had to balance my program on my knee and against my purse, so that there was not a reflection).

 The performers were awesome...    I loved that before each piece, they spoke a little about the music, so it was nice to have that background history. And they both had a fun sense of humor.


...the music terrific...


 ...the conductors were both very entertaining to watch, listen to, and both had fun sense of humor.


I loved that before each piece, they spoke a little about the music, so it was nice to have that background history.


In this short video clip is a slice of "Concerto for Two Clarinets" by Krommer, written during the early 1800's.  It has been written that Franz Krommer had composed over 300 compositions.


 This portion of music, is very recognizable... Composed by Sir Edward Elgar.

This piece of British origins, is played at a many, many high school and college graduations throughout. 

 The best known of the set, it had its premiere, along with the more reserved second March, in Liverpool on 19 October 1901, with Elgar conducting the Liverpool Orchestral Society.[4] Both marches were played two days later at a London Promenade Concert in the Queen's Hall London, conducted by Henry Wood, with March No. 1 played second, and the audience "...rose and yelled... the one and only time in the history of the Promenade concerts that an orchestral item was accorded a double encore."[5]      (This info taken from Wikipedia).


And this was the end of Elgar's "Pomp and Circumstance" 


 Joining in with Jenny's Alphabe-thursday "O"!
 
And here is recent artwork of an Alto Saxophone drawn entirely with the name GRANT.


Hans Christian Andersen's quote was written in the lettering style: Papyrus

and have you heard of a Euphonium?


This Euphonium was drawn with the name JONATHAN.  Psalm 95:1 was written in the lettering style: monotype corsiva


 Signature for blog

Wednesday, February 19, 2014

Neighborhood and celebrating Nuptial ties...

In our Neighborhood...The past couple of weeks, as is the case in many areas around the United States, we have had quite a bit of snow and ice.

Here are some photos that I had taken just in our neighborhood!

...right across the street of our home...taken Feb 7, late afternoon.  The Lord's beauty abounds all around us!

***

 The day before Superbowl Sunday (Feb 2nd) there was no snow around our Neighborhood!


This is our home on Feb 5th. Our grass was visible on Feb 2nd...but by the next morning on Feb 3rd, it was covered in snow.
***

A view our home through our neighbors river birch. They look like fragile fingers in ice covered gloves.

Feb 7th
***

Many of the river birch, like this one, were bent, bowed, and broken with the weight of the ice from the ice storm.

Feb 7th
 ***

It was absolutely breathtaking to see all the beauty of the sunshine reflecting from the snow and ice.

 
Feb 7th

The river birch branches look like crystal ice sculptures.

Feb 7th
The ornamental grass look like stalks of spun gold.

Feb 7th
 Frozen fir trees, with limbs also touching the ground beneath them.

 ***


The snow sparkles down a path...that seems to promise a secret passage way towards the bright blue, sunlit skies and fluffy clouds.


Here is another view as I stand at the top of our driveway.  The clouds look like they are gracefully floating, enjoying the views beneath them.  (None of these photos were taken with any special filters...I wish that I could have captured the absolute, amazing sights...but nothing can compare to seeing everything as it was in real life!)

 ***

Here are a few more photos, taken on Feb 12th... celebrating our nuptials in snowy Wisconsin...

~1982 ~


My handsome hubby, handsome dad, beautiful mom, and handsome little brother (our ring bearer).


Cutting our wedding cake and very nicely :o) feeding each other a bite.


...I didn't have a bouquet of flowers, but was holding 3 long stem roses.


Fast forward 32 years later to Feb 12, 2014...on a snowy Kentucky morning...


I woke up to these three long stem roses and a card from my wonderful, handsome hubby that he had for me before he left for work.


This is a photo taken, on our way to our 6pm reservations to a great little supper club in a town near where we live.

Here we are enjoying our delicious meal. Everything was perfect. I love that the music playing was ones sung by artists like Nat King Cole, Bing Crosby, Johnny Mathis, etc...


& a special treat was the amazing Chocolate Raspberry torte with ganache made in house and given to us, on the house :o)

***

And here are some art drawn with "N" names...


 This monogram PNK  was drawn with
P entirely with the groom's name PATRICK
N entirely with their last name NALL
K entirely with the bride's name KRISTA


This initial N was drawn with the first name NICOLE


This little lion is guarding this letter N...They were drawn with this little guy's first name NOAH.
(shown in black and white and also after color was added to the little lion.)


Joining in with Jenny's Alphabe-thursday's letter N!

 Signature for blog

Wednesday, February 12, 2014

Mason Jar Soap Dispenser Tutorial

Here is a tutorial of my MASON JAR Soap Dispenser.


I first saw a manufactured one in a store a few years back, and had been meaning to make some for our home and also for gifts.

I love mason jars...seltzer bottles...and glass jars or any kind...
Here are a few mason jars on some of our kitchen cabinets... The huge one with the pump on it, is actually an old syrup dispenser.


Back when we first moved to our new home (last April), I made the first soap dispenser for me (I wanted to be sure to work out the kinks)...but actually, no kinks needed to be adjusted... Super easy-peasy!

So, I made some for our grown kids, for friends, for friends' friends...and our younger daughter, Girly~Whirly, was visiting at Thanksgiving, so she made one for a friend...and then I showed a couple of friends, who made some for their friends...  they are like rabbits that keep having more rabbits and more rabbits...

Well, only after making mine, did I think to look on pinterest or google for a tutorial. And there are some great ones out there.  But I did not see any like how I made mine, so here it goes:

STEP 1  ~ Supplies: 


1. Any jar of the size you prefer (I used the jars from some yummy organic spaghetti sauce we like. ..but a canning jar with the silver metal lids will work).

2. Spray paint (I like the black matte finish...this helps to keep the lids from rusting...bright color paint would be fun).

3. paper bag, hammer, nail or screw, heavy duty shears/scissors (or metal cutter, if you do not have heavy duty shears/scissors...ours is from Cutco company and is known for its ability to cut a penny!) 

4. bottle of soap (I like the Bath and Body foaming soap pump...but there are soaps at the dollar store or other stores too).
 
STEP 2  ~ Hammer Holes:


 Hammer a few holes with the nail/screw in the center of the lid. I did this on our garage floor.


Be sure the hole is large enough for the tip of heavy duty shears/scissors or metal cutter to fit into.

 STEP 3  ~ Cut wedges:


With your heavy duty shears/scissors or metal cutter, snip wedges. This lid had the center circle that worked perfectly for me to fit the size of the soap pump I use.  (You may need to mark a circle with a sharpie, as a guide to where you need to cut to).

 STEP 4  ~ Open hole:


On the inside of the lid, with the tip of my heavy duty shears, I turn the wedge to curl back. This creates a large hole, that does not have a sharp edge. 
And all the curled wedges, help to secure the soap pump.  **KEEP in mind, unlike some other tutorials that use silicon or another adhesive to seal their pump to the lids, I do not, so it will leak if tipped over.** But you could add a strong adhesive or silicon along the rim of the pump.


Test out the size of the hole with a soap pump.
With your shears or with your fingers, you can adjust the wedges so your pump has a good, snug fit.

  STEP 5  ~ Spray paint lid:


I spray painted these ones in the picture today.  So, yes, I put the paper bag out onto the snow :o)
Be sure to spray one side and let dry very well, before turning over lids and spraying paint on the other.  Be sure to cover all areas well with paint, so that any exposed metal from cutting will not rust.

  STEP 5  ~ Soap pump ready:


Tah-dah! Once paint is all dry, simply push pump into the hole. The diameter of the soap pump will "hide" any uneven opening.

(I just took a photo of the lid I used that had advertisement printing on it, to show you that the pain covered what was on it very well).

STEP 6 ~ Perfect gift:


Completed, hand crafted mason soap jar and a bottle of handsoap are ready to go in a gift bag...perfect for a housewarming gift or a "just because" gift :o)

***TIP #1:  The "plastic tubes" that come with the original soaps are a wee short for the taller jars that I show here, but they still work well. I would buy some inexpensive spray bottles from a dollar store and swap out the tubes.   Or I would use shorter jars.

Tim #2: To make the soap stretch (at least, with Bath & Body brands), I mix half soap with half water.

***
Here is photo of the one I did today for our kitchen hand soap.  We have a built in soap pump that I use for dish detergent, in the counter top, but I still like to have hand soap readily available, so have the mason jar filled with hand soap.


 And here are more I made last year, for each of the bathrooms...in our home…

 (well...actually, in our master bathroom on the bottom right, I have a different dispenser, but the half bathroom, the two upstairs bathrooms, and the bottom left shows the basement/family/studio bathroom all have their mason jar soap dispensers ready for duty :o))

***

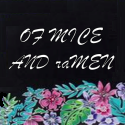
Although I have not drawn a mason jar (I would love to do that some time :o), I am sharing some past artwork that start with "M".   If you are new to my blog, I share with every post, some art that I have completed. Every one is drawn entirely using a person's name.

This little monkey was drawn entirely with the name LIAM. Additional birth info, in calligraphy, with the lettering called: Bayoneta Pro


This wedding monogram was drawn with C in the bride's name: CODY
S in their last name: STEPHENS and
B in the groom's name: BRAD

The monogram and the calligraphy of their wedding date at the bottom right border was in the lettering style: Sweet Upright Script


This monogram was drawn for the groom's parents.
The first D drawn entirely of DAVID,
The S drawn with their last name: STEPHENS,
the second D drawn with the name: DEBRA

The lettering style of the monogram was in lettering called: Rosabella


This Military one is of a Military Police badge. It was drawn entirely with the last name: KING
Additional calligraphy written above and beneath it, was written in an Old English style lettering.


The first image is shown in black ink only. And the second shows a little gray color added afterwards.

***

 Today, my hubby and I are celebrating 32 wonderful, blessed years married. 

Here is my post a few years ago, when we lived in Georgia and celebrated our 29th Anniversary in Savannah. ...another post for our 30th Anniversary. ...our 31st Anniversary was awesome too, but with moving here to Kentucky, I didn't get a post up last year.  Next week, I hope to have some pics of our 32nd Anniversary and a bit about what's been happening in our neck of the woods.

Also, Happy Valentine's Day!

Joining in with Jenny's Alphabe-Thursday's M!

Thank you for stopping over and taking the time to leave a comment.  I'd love to know what you have made with mason jars?

Joining in with Jenny's Alphabe-Thursday's E


 Signature for blog
Related Posts with Thumbnails